
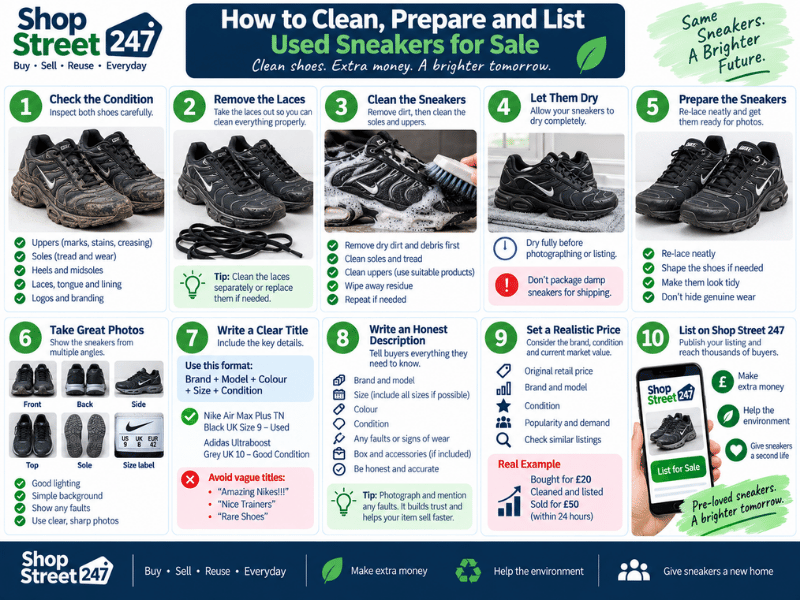
How to Clean, Prepare and List Used Sneakers for Sale
Turn Your Pre-Loved Sneakers Into Something Someone Else Will Love
Got an old pair of sneakers sitting at the back of your wardrobe?
They might look a little tired, dirty or forgotten, but that doesn’t necessarily mean they’re ready for the bin.
With some careful cleaning, a little preparation and a good listing, you could give your old sneakers a second life — and potentially make some extra money at the same time.
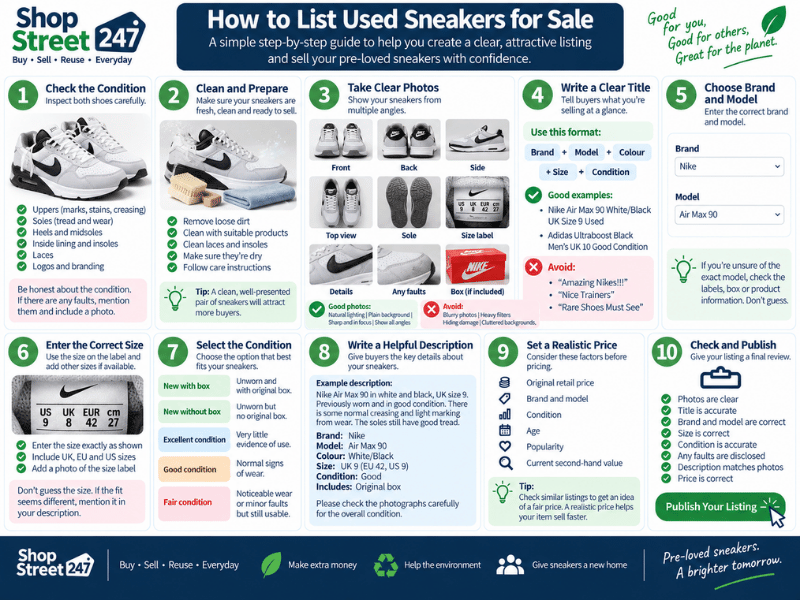
The process can be broken down into three main stages:
1. Clean your sneakers
2. Prepare them for sale
3. Photograph and list them
Here’s how to do it.
Step 1: Decide Whether the Sneakers Are Worth Selling
Before spending time cleaning a pair, inspect them carefully.
Some dirt and everyday wear may be manageable, but significant damage can make a pair much harder to sell.
Check the:
👟 Uppers
👟 Midsoles
👟 Outsoles and tread
👟 Heel area
👟 Laces
👟 Tongues
👟 Insoles
👟 Interior lining
👟 Stitching
👟 Logos and branding
Look for problems such as:
- Heavy staining
- Holes or tears
- Sole separation
- Excessive tread wear
- Damaged interiors
- Missing parts
- Significant discolouration
Don’t automatically reject a dirty pair. Sometimes dirt makes sneakers look considerably worse than they really are.
However, heavily stained or damaged footwear may require more time and effort than it’s worth.
Step 2: Remove the Laces
Before cleaning, take the laces out.
This makes it easier to reach the tongue and areas of the upper that would otherwise be hidden behind the laces.
It also means you can clean the laces separately.
If the original laces are badly damaged, make sure their condition is accurately represented when you eventually create your listing.
Step 3: Remove Dry Dirt First
One of the most useful things you can do is remove as much loose dirt as possible before getting the sneakers wet.
Mud can become messier once water is introduced.
Use an appropriate dry brush or other suitable tool to gently remove:
- Dried mud
- Stones
- Dust
- Gravel
- Dirt trapped in the tread
- Loose debris
Pay particular attention to the grooves on the bottom of the shoes.
Quick Cleaning Flow
Remove laces
↓
Remove stones and debris
↓
Brush away dry dirt
↓
Begin wet cleaning
Getting rid of loose debris first makes the next stage much easier.
Step 4: Clean the Soles
Once you’ve removed as much dry dirt as possible, you can start cleaning the soles.
The exact cleaning method should depend on the materials and manufacturer’s care instructions.
For suitable footwear, warm water, an appropriate cleaning solution and a brush may help loosen remaining dirt.
Focus on:
Outsoles — Remove dirt from the tread and grooves.
Midsoles — Carefully tackle visible marks and grime.
Edges — Dirt often builds up around the edges where the upper meets the sole.
Important
Don’t assume every sneaker can be cleaned in the same way.
Suede, leather, mesh and other materials can require very different treatment. Check the manufacturer’s care guidance and test cleaning products carefully before using them extensively.
Step 5: Clean the Uppers
Next, move on to the upper part of the sneaker.
A suitable handheld brush can help work on dirt trapped in materials such as mesh, but always use a cleaning method appropriate for the specific material.
Don’t scrub aggressively simply because a mark won’t disappear.
You don’t want to turn a dirty but sellable pair of sneakers into a damaged pair.
Remember:
Clean to improve the sneakers — not to make used sneakers look falsely new.
Signs of genuine wear should still be disclosed to the buyer.
Step 6: Wipe Away Cleaning Residue
Once you’ve finished a cleaning pass, remove remaining moisture, dirt and cleaning residue with an appropriate clean cloth.
A microfibre cloth can be useful for many suitable surfaces.
Pay attention to cleaning product left on the uppers, as residue may affect the appearance when it dries.
If the sneakers are still dirty, you may need another careful cleaning pass rather than trying to remove everything at once.
Step 7: Let the Sneakers Dry Properly
Don’t rush straight from cleaning to taking your listing photographs.
Allow the sneakers to dry properly according to their care requirements.
Wet sneakers can look darker or different in colour, which means your photographs may not accurately represent what the buyer will receive.
Never package damp footwear for shipping.
Step 8: Re-Lace and Prepare the Sneakers
Once clean and dry, presentation becomes important.
Put the laces back in neatly and make sure both sneakers look consistent.
If you’re comfortable doing so, you can also gently shape the shoes for photographs using clean, dry stuffing that’s appropriate for the footwear.
The objective is simple:
Make them look tidy, not misleading.
Don’t digitally hide creases, damage, stains or other signs of wear.
You’re selling a used product, and the photographs should accurately represent its actual condition.
Step 9: Take Great Photos
Now your sneakers are clean and prepared, it’s time for the photographs.
Good sneaker photos should help someone inspect the shoes almost as if they were holding them.
📸 Photograph:
1. Both sneakers together
Start with a strong main image showing the complete pair.
2. Front
Show both toe boxes.
3. Back
Show the heels clearly.
4. Left and right sides
Photograph the sneakers from both sides.
5. Top
Show the tongues, laces and interior opening.
6. Outsoles
Don’t skip this one. Sole wear is important when evaluating used footwear.
7. Size labels
Photograph the manufacturer’s size information clearly.
8. Insoles and interior
Show their condition where practical.
9. Branding
Include clear images of logos and identifying details.
10. Faults
Take close-ups of significant marks, scratches, creasing, stains, damaged material or excessive wear.
Good Photos
✓ Bright
✓ Sharp
✓ Multiple angles
✓ Simple background
✓ Accurate colours
✓ Actual sneakers being sold
Avoid
✗ Heavy filters
✗ Dark photographs
✗ Blurry photos
✗ Hiding the soles
✗ Concealing damage
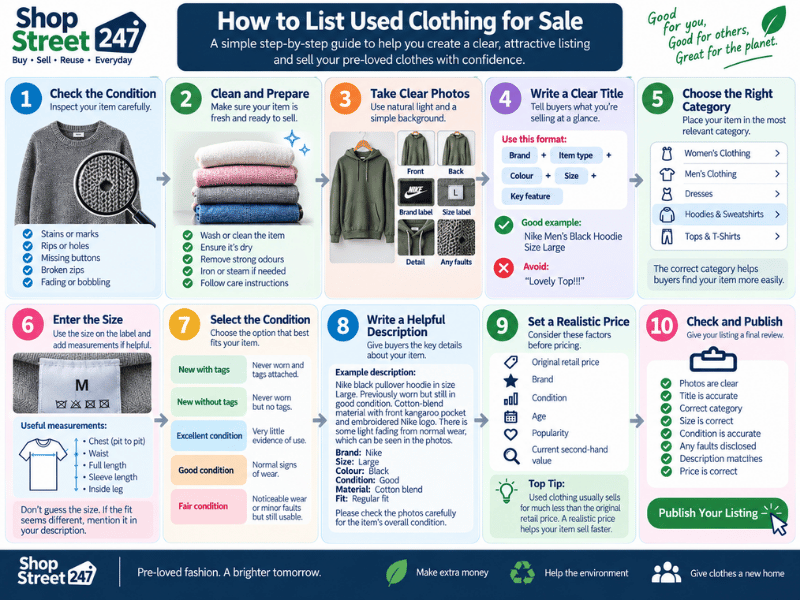
Step 10: Create a Search-Friendly Title
Your title should quickly explain what you’re selling.
Try this format:
Brand + Model + Colour + Size + Condition
For example:
Nike Air Max Plus TN Black UK Size 9 – Used
That’s far more useful than:
❌ Amazing Nikes!!!
❌ Nice Trainers
❌ Rare Shoes
Buyers searching for a particular sneaker are likely to use terms such as the brand, model, colour and size.
Make those details easy to find.
Step 11: Describe the Sneakers Honestly
Your description should give the buyer the information they can’t get from the title alone.
Include:
Brand: Nike
Model: Air Max Plus TN
Colour: Black
Size: UK 9
Condition: Used
Box: Included / Not Included
Laces: Original / Replacement, if known and relevant
Then explain the condition.
For example:
Nike Air Max Plus TN in black, UK size 9. Pre-owned and cleaned before listing. The sneakers show normal signs of previous use, including some creasing and light marks. Please see the photographs for close-ups of the condition, soles and size label.
Don’t describe used sneakers as being in perfect condition if they aren’t.
A clear description can help set the right expectations before somebody buys.
Step 12: Show Every Important Fault
If there’s a problem, say so.
For example:
“There is visible wear on the outer heel of the right sneaker. Please see photo 8.”
Or:
“Both toe boxes have creasing from previous wear.”
Or:
“Original box is not included.”
This is much more useful than simply writing:
“Used but good.”
Remember
Photograph it + Describe it + Price accordingly
That simple rule can help you create more transparent second-hand listings.
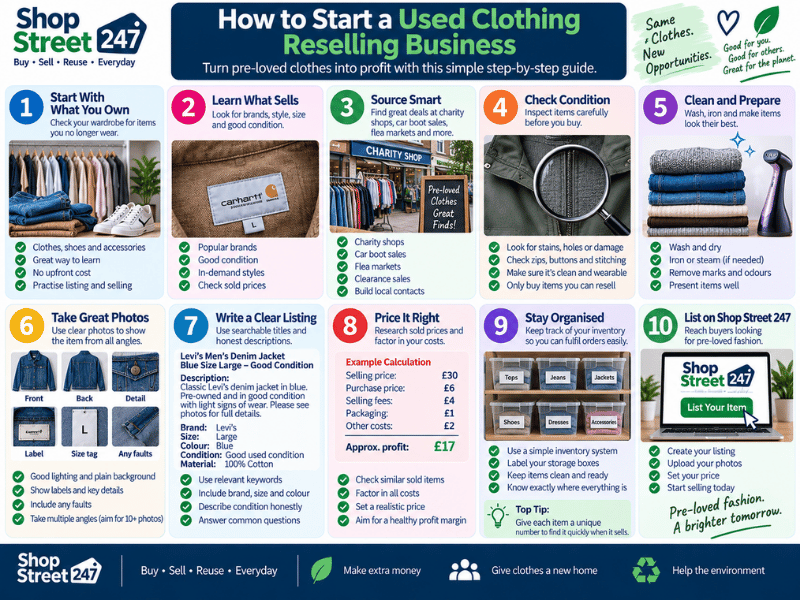
Step 13: Set a Realistic Selling Price
Cleaning a pair doesn’t automatically make it valuable.
Before choosing your price, consider:
💷 Original retail price
🏷️ Brand and model
⭐ Current condition
👟 Amount of wear
📦 Original box and accessories
🔥 Popularity and demand
🔎 Prices of comparable used pairs
Look at similar sneakers in a similar condition, rather than comparing your used pair with brand-new examples.
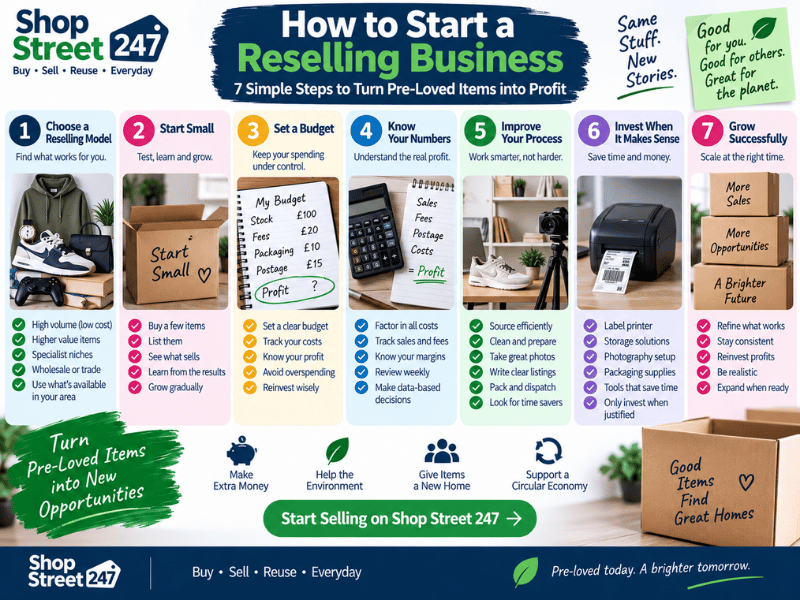
If you’re buying sneakers specifically to resell, also think about your costs.
Simple Reselling Calculation
Expected selling price
− Purchase cost
− Cleaning/preparation costs
− Selling/payment costs
− Delivery costs you are responsible for
= Potential profit
Don’t forget to put a value on your time too.
A Real Example: £20 to £50
The process that inspired this guide used a pair of black Nike Air Max Plus TN sneakers purchased pre-owned for £20.
The sneakers weren’t destroyed — they were simply dirty and needed cleaning and presentation work.
After cleaning the soles and uppers, preparing the sneakers and photographing them, the pair was listed for sale.
According to the seller, they sold for £50 around 24 hours after being listed.
That’s a useful example of why presentation can matter when selling second-hand footwear.
However, it doesn’t mean every £20 pair of sneakers will sell for £50. Brand, model, size, condition, demand and selling costs can all affect the result.
Used Sneaker Reselling: The Complete Process
👟 FIND
Find sneakers you own but no longer wear — or source pre-loved pairs carefully.
↓
🔎 INSPECT
Check the condition and decide whether they’re worth your time.
↓
🧹 CLEAN
Remove loose debris and carefully clean using methods suitable for the materials.
↓
✨ PREPARE
Dry, re-lace and present the sneakers neatly.
↓
📸 PHOTOGRAPH
Show the entire pair, labels, soles, details and faults.
↓
📠DESCRIBE
Add the correct brand, model, size and honest condition information.
↓
💷 PRICE
Research comparable second-hand pairs and choose a realistic price.
↓
ðŸ›ï¸ LIST
Publish your sneakers for shoppers to discover.
Final Checklist Before You List
Before pressing publish, ask yourself:
☐ Are both sneakers clearly photographed?
☐ Have I shown the soles?
☐ Have I photographed the size label?
☐ Is the brand correct?
☐ Is the model correct?
☐ Is the size correct?
☐ Have I accurately described the condition?
☐ Have I photographed and disclosed important faults?
☐ Have I said whether the original box or accessories are included?
☐ Is my price realistic?
☐ Does my description match the actual pair?
If the answer is yes, you’re ready to list.
Give Your Old Sneakers a Second Life
A dirty pair of sneakers doesn’t necessarily need to be thrown away.
With some careful cleaning and preparation, the shoes you no longer want could become someone else’s next favourite pair.
And that’s what Shop Street 247 is all about.
Sell what you don’t need. Find something you want. Keep good products in circulation for longer.
Got Sneakers Ready to Sell?
Give them a clean. Take some great photos. Be honest about their condition. Set your price.
Then list them for sale on Shop Street 247.
Shop Street 247
Buy • Sell • Reuse • Everyday